[Open API] OpenweatherMap Open API

OpenweatherMap

날씨 정보를 제공하는 OpenAPI로 APi key를 발급받아 사용한다.

https://www.openweathermap.org/

Usage

OpenWeatherMap은 API 호출시 API Key를 APPID 파라미터로 전달한다. 예를 들어 서울의 날씨를 얻으려면

1
2
api.openweathermap.org/data/2.5/weather?q={city name}
api.openweathermap.org/data/2.5/weather?q={city name},{country code}

그러나 한 API Key로 10분에 1번 호출 해야 한다.

API Key

4ecbcfa0c4210bfff11d93ea02cd9290

1
http://api.openweathermap.org/data/2.5/weather?q=seoul,kr&appid=4ecbcfa0c4210bfff11d93ea02cd9290

API 가입

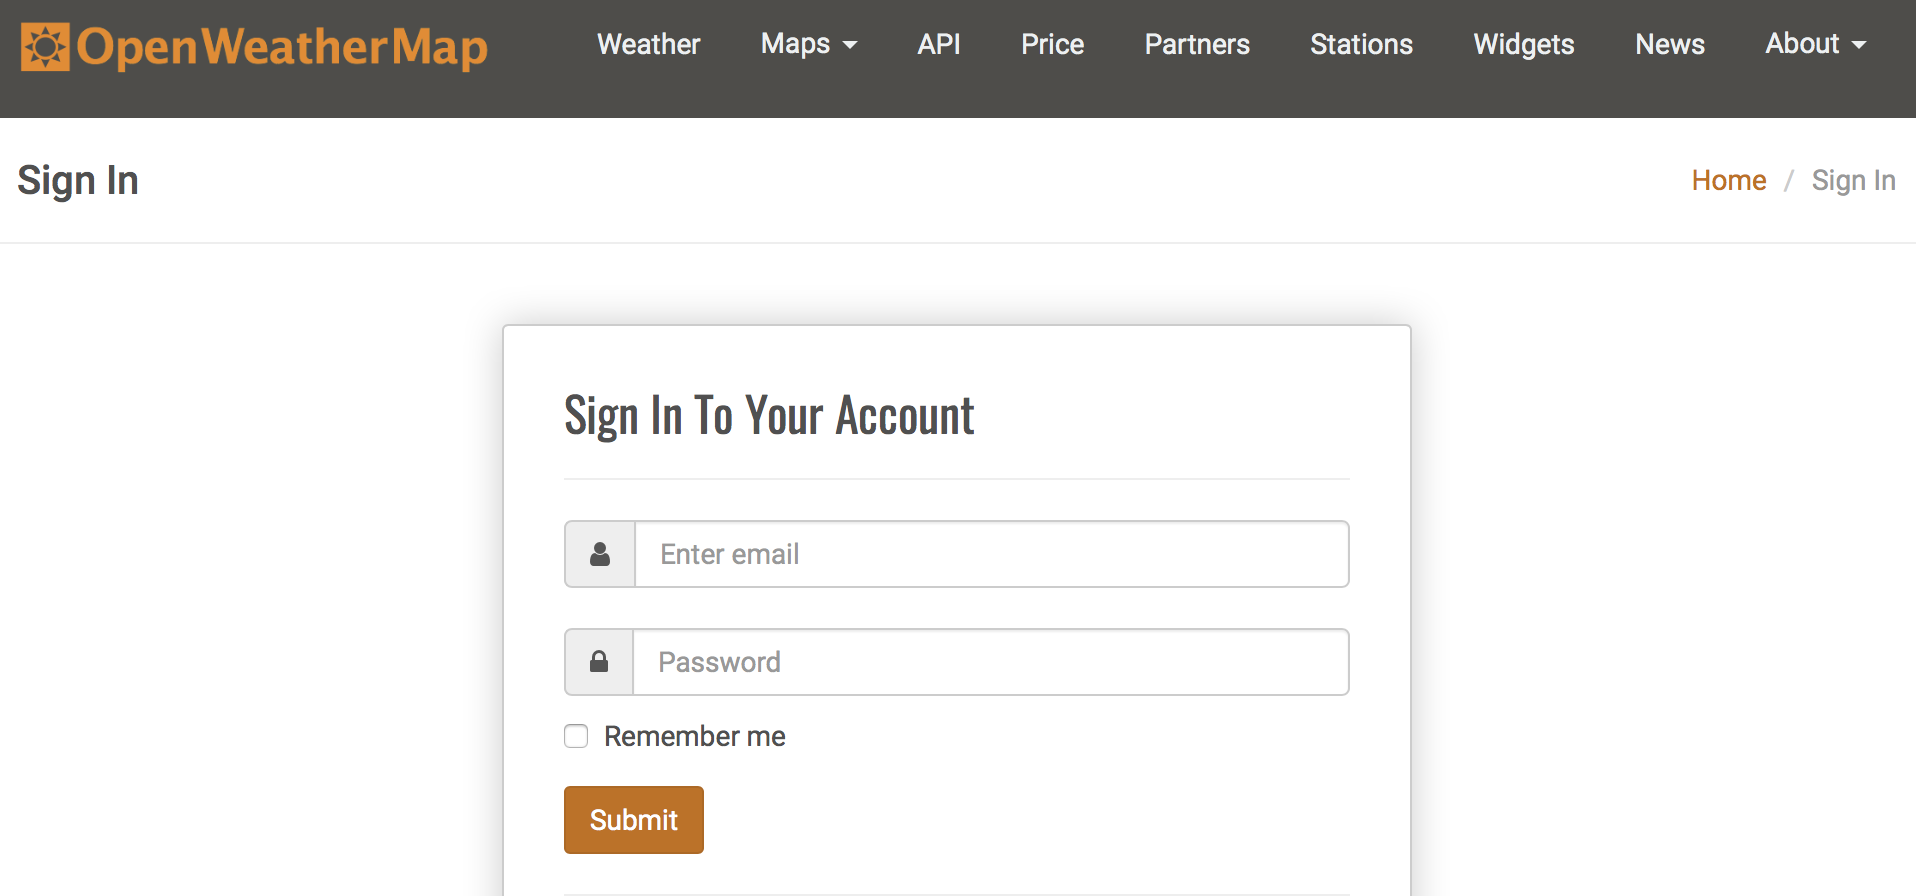
https://openweathermap.org/api 에서 원하는 API를 골라 Subscribe 한 후에 사용할 수 있다. 가입 자격에 따라서 API 호출 빈도가 달라진다.

Weather data

JSON
Example of API respond:

1
2
3
4
5
6
7
8
9
10
11
12
13
14
15
16
17
18
19
20
21
22
23
24
25
26
27
28
29
30
31
32
33
34
35
36
37
38
39
40
41
42
{
"coord": {
"lon": 126.98,
"lat": 37.57
},
"weather": [
{
"id": 701,
"main": "Mist",
"description": "mist",
"icon": "50n"
}
],
"base": "stations",
"main": {
"temp": 276.15,
"pressure": 1013,
"humidity": 64,
"temp_min": 276.15,
"temp_max": 276.15
},
"visibility": 11265,
"wind": {
"speed": 5.7,
"deg": 310
},
"clouds": {
"all": 90
},
"dt": 1523044560,
"sys": {
"type": 1,
"id": 7673,
"message": 0.0075,
"country": "KR",
"sunrise": 1522962579,
"sunset": 1523008779
},
"id": 1835848,
"name": "Seoul",
"cod": 200
}

Parameters:

  • coord
    • coord.lon City geo location, longitude
    • coord.lat City geo location, latitude
  • weather (more info Weather condition codes)
    • weather.id Weather condition id
    • weather.main Group of weather parameters (Rain, Snow, Extreme etc.)
    • weather.description Weather condition within the group
    • weather.icon Weather icon id
  • base Internal parameter
    main
    main.temp Temperature. Unit Default: Kelvin, Metric: Celsius, Imperial: Fahrenheit.
    main.pressure Atmospheric pressure (on the sea level, if there is no sea_level or grnd_level data), hPa
    main.humidity Humidity, %
    main.temp_min Minimum temperature at the moment. This is deviation from current temp that is possible for large cities and megalopolises geographically expanded (use these parameter optionally). Unit Default: Kelvin, Metric: Celsius, Imperial: Fahrenheit.
    main.temp_max Maximum temperature at the moment. This is deviation from current temp that is possible for large cities and megalopolises geographically expanded (use these parameter optionally). Unit Default: Kelvin, Metric: Celsius, Imperial: Fahrenheit.
    main.sea_level Atmospheric pressure on the sea level, hPa
    main.grnd_level Atmospheric pressure on the ground level, hPa
    wind
    wind.speed Wind speed. Unit Default: meter/sec, Metric: meter/sec, Imperial: miles/hour.
    wind.deg Wind direction, degrees (meteorological)
    clouds
    clouds.all Cloudiness, %
    rain
    rain.3h Rain volume for the last 3 hours
    snow
    snow.3h Snow volume for the last 3 hours
    dt Time of data calculation, unix, UTC
    sys
    sys.type Internal parameter
    sys.id Internal parameter
    sys.message Internal parameter
    sys.country Country code (GB, JP etc.)
    sys.sunrise Sunrise time, unix, UTC
    sys.sunset Sunset time, unix, UTC
    id City ID
    name City name
    cod Internal parameter

MongoDB Community Edition 3.6 on Ubuntu

2018-06-22 내용 정리, User auth 링크
{:.right-history}

이 문서는 Ubuntu/Debian 계열 정규 배포본에 3.x 버전을 지원하지 않는 플랫폼에 MongoDB Community Edition 3.6 버전을 설치하는 과정을 정리하고 있다. 내용의 기초는 MongoDB Community Edition 3.6 버전을 Amd64, Arm64 지원하는 64bit OS에 설치해 사용하기 위해서 Install MongoDB Community Edition, on-ubuntu를 따라서 진행하고 경험상 필요한 부분을 추가로 정리했다.

  • MongoDB Community Edition 3.6 설치
  • Mongo Database 구성
자세히 보기

[Open API] REST Architecture 요약

REST Architecture

Oracle 에서 발표한 자료에서 설명한 내용을 정리한다.

Deview 2017 “그런 REST API로 괜찮은가”

Deview 2017 “그런 REST API로 괜찮은가” 발표자료

RESTFull API

RESEFull API는 기술적으로 다음 같이 발전해 왔다.

HTTP/1.0 1994-1996

Roy T. Fielding, HTTP Object Model

“How do i improve HTTP without breaking the Web?”

REST 1998

Roy T. Fielding, Microsoft Research 발표

“Representational State Transfer:
An Architectural Style for Distributed Hypermedia Interaction”

REST 2000

Roy T. Fielding, 박사 논문으로 발표

“Architectural Styles and the Design of Network-based Software Architectures”

이 기술의 근간은 Web API 이다.


SOAP

Micsoft에서도 XML-RPC 1998를 통해 Web API를 구현하고자 했다.

Microsoft, SOAP

Salesforce API

Salesforce API, 2000 은 이런 방식을 처음 도입했다.
https://web.archive.org/web/20001018092215/http://salesforce.com/

flickr API

flickr의 SOAP

https://web.archive.org/web/20040921173223/http://www.flickr.com:80/services/api/response.soap.html

flickr의 REST API

https://web.archive.org/web/20040821031039/http://www.flickr.com:80/services/api/response.rest.html

SOAP과 REST
SOAP REST
- 복잡하다 - 단순하다
- 규칙 많음 - 규칙 적다
- 어렵다 - 쉽다

Google trends 검색

2006년, AWS가 자사 API의 85%를 REST로 구현
2010년, Salesforce.com에서 REST API 추가

CMIS

2008년 CMIS 표준 준비

그러나 Roy T. Fielding: “No REST in CMIS”

REST API guideline

2016년 Microsft 가 제시한 REST API Guideline

Roy T. Fielding:
“s/REST API/HTTP API/“

http://roy.gbiv.com/untangled/2008/rest-apis-must-be-hypertext-driven

그리고

“REST API를 위한 최고의 버저닝 전략은 버저닝을 안 하는 것”

결국 REST API는

  • REST 아키텍쳐 스타일을 따르는 API
  • 분산 하이퍼미디어 시스템(예: 웹)을 위한 아키텍쳐 스타일
  • 아키텍쳐 스타일: 제약조건의 집합

REST 를 구성하는 스타일

아키텍쳐 스타일 은 다음 같이 구성된다:

  • client-server
  • stateless
  • cache
  • uniform interface
  • layered system
  • code-on-demand (optional)
Uniform interface

Uniform Interface

  • identification of resources
  • manipulation of resources through representations
  • self-descriptive messages
  • hypermedia as the engine of application state (HATEOAS)
Self descriptive message

Self-descriptive message, 메시지는 스스로를 설명해야한다

1
GET / HTTP/1.1

이 HTTP 요청 메시지는 뭔가 빠져있어서 self-descriptive 하지 못하다.

목적지를 추가하면 이제 self-descriptive

1
2
GET / HTTP/1.1
Host: www.example.org

결과 메시지도

1
2
3
HTTP/1.1 200 OK

[ { "op": "remove", "path": "/a/b/c" } ]
1
2
3
4
HTTP/1.1 200 OK
Content-Type: application/json-patch+json

[ { "op": "remove", "path": "/a/b/c" } ]
HATEOAS

애플리케이션의 상태는 Hyperlink를 이용해 전이되어야한다.
http://slides.com/eungjun/rest#/37

독립성

서버와 클라이언트가 각각 독립적으로 진화한다.
서버의 기능이 변경되어도 클라이언트를 업데이트할 필요가 없다.
REST를 만들게 된 계기: “How do I improve HTTP without breaking the Web.”

호환성 유지

HTML5 첫 초안에서 권고안 나오는데까지 6년

  • HTML5 드래프트 2008년 1월, 첫 권고안 2014년 10월

HTTP/1.1 명세 개정판 작업하는데 7년

  • HTTP/1.1 명세 세 번째 개정판인 RFC 7230-7235의 작업기간 2007년 12월 - 2014년 6월

상호운용성에 대한 집착

Referer 오타지만 안 고침

Referer의 개념을 Tim Berners Lee에게 제안한 것은 Phillip M. Hallam-Baker 이지만, 이름까지 정해서 주지는 않았다고 한다. 따라서 오타를 만든 것은 Tim Berners Lee인 것으로 추정하는듯.

See https://lists.w3.org/Archives/Public/ietf-http-wg-old/1995JanApr/0109.htm

charset 잘못 지은 이름이지만 안 고침

charset은 “character set”이 아님에도 불구하고 그런 오해를 계속해서 불러일으키고 있다.

http://w3-org.9356.n7.nabble.com/How-to-pronounce-quot-charset-quot-td254585.html#message254629

HTTP 상태 코드 418 포기함 (I’m a teapot)

https://www.facebook.com/eungjun/posts/10213901564392694

HTTP/0.9 아직도 지원함 (크롬, 파이어폭스)

구글 크롬에서 HTTP/0.9 지원을 완전히 제거하려다 실패했다. Tenda D301 router와의 호환성이 깨지는 문제가 발견되어서. default port인 경우에만 HTTP/0.9를 지원하도록 하려고 했는데 그마저도 문제가 발견되어 revert했다:
https://bugs.chromium.org/p/chromium/issues/detail?id=624462

REST가 웹의 독립적 진화에 도움을 주었나
  • HTTP에 지속적으로 영향을 줌
  • Host 헤더 추가
  • 길이 제한을 다루는 방법이 명시 (414 URI Too Long 등)
  • URI에서 리소스의 정의가 추상적으로 변경됨: “식별하고자 하는 무언가”
  • 기타 HTTP와 URI에 많은 영향을 줌
  • HTTP/1.1 명세 최신판에서 REST에 대한 언급이 들어감
  • Reminder: Roy T. Fielding이 HTTP와 URI 명세의 저자 중 한명입니다

그럼 REST는 성공했는가

  • REST는 웹의 독립적 진화를 위해 만들어졌다
  • 웹은 독립적으로 진화하고 있다
  • 성공!

그런데 REST API는?
REST API는 REST 아키텍쳐 스타일을 따라야한다.
오늘날 스스로 REST API라고 하는 API들의 대부분이 REST 아키텍쳐 스타일을 따르지 않는다.

REST 스타일 가이드를 따랴야 한다.링크

An API that provides network-based access to resources via a uniform interface of self-descriptive messages containing hypertext to indicate potential state transitions might be part of an overall system that is a RESTful application
– Roy T. Fielding

구현이 쉽지는 않다.

원격 API가 REST API여야 하나?

시스템 전체를 통제할 수 있다고 생각하거나, 진화에 관심이 없다면, REST에 대해 따지느라 시간을 낭비하지 마라

링크

REST emphasizes evolvability to sustain an uncontrollable system. If you think you have control over the system or aren’t interested in evolvability, don’t waste your time arguing about REST.
– Roy T. Fielding

현재는

(1) REST API를 구현하고 REST API라고 부른다.
(2) REST API 구현을 포기하고 HTTP API라고 부른다.
(3) REST API가 아니지만 REST API라고 부른다. (현재 상태)

그러므로 제약 조건을 따르던지 다른 단어를 써라!!!

I am getting frustrated by the number of people calling any HTTP-based interface a REST API. … Please try to adhere to them or choose some other buzzword for your API.
– Roy T. Fielding

일반 Web과 REST API 비교

http://slides.com/eungjun/rest#/63

open api spec

https://github.com/OAI/OpenAPI-Specification/blob/master/versions/2.0.md

Open API Web Token

Open api key

API keys는 사용자 인증, 요청 API 호출을 위해 필요하다.

보통 RESTFull API 호출시 API keys 와 인증 스킴을 사용한다. 주요 차이는:

  • API keys : 앱 혹은 사이트 호출을 식별해서 API 호출을 만다.
  • Auth tokens : 앱 혹은 사이트 사용자를 식별한다.
자세히 보기

[Open API] Alading Bookstore Open API

Aladin Open API

키 인증 방식으로 일반 1일 호출 5000회 가능하다.

http://blog.aladin.co.kr/openapi/category/29154404?communitytype=MyPaper

TTB 가입 방법

여기 http://www.aladdin.co.kr/ttb/wjoinus.aspx 에서 TTB 가입한다. 승인 완료되면 TTB Key값이 발급된다.

TTB Key값은 http://www.aladin.co.kr/ttb/wblog_manage.aspx 이 페이지에서 조회하실 수 있습니다. 이 키값은 OPENAPI 키값으로 사용됩니다.

상품 API

여기 http://blog.aladin.co.kr/openapi/category/29154402?communitytype=MyPaper 설명되어 있다.

  • 제공 리스트 종류
  • 신간 전체 리스트
  • 주목한 만한 신간 리스트
  • 편집자 추천 리스트(카테고리로만 조회 가능 - 국내도서/음반/외서 만 지원)
  • 베스트셀러
  • 북플 베스트셀러(국내도서 만 조회 가능)

요청 URL : http://www.aladin.co.kr/ttb/api/ItemList.aspx

요청 URL샘플 :

1
http://www.aladin.co.kr/ttb/api/ItemList.aspx?ttbkey=TTBKey&QueryType=ItemNewAll&MaxResults=10&start=1&SearchTarget=Book&output=xml&Version=20131101

상품 json 형식

item array 밑에 결과 데이터가 있다.

1
2
3
4
5
6
7
8
9
10
11
12
13
14
15
16
17
18
19
20
21
22
23
24
25
26
27
28
29
30
31
32
33
34
35
36
37
38
39
40
41
42
43
44
45
46
47
48
49
50
51
52
53
54
55
56
57
58
59
60
61
62
63
64
65
66
67
68
69
70
71
72
73
74
75
76
77
78
79
80
81
82
83
84
85
86
87
88
89
90
91
92
93
94
95
96
97
98
99
100
101
{
"version": "20131101",
"logo": "http://image.aladin.co.kr/img/header/2011/aladin_logo_new.gif",
"title": "알라딘 베스트셀러 리스트 - 소설/시/희곡",
"link": "http://www.aladin.co.kr/shop/common/wbest.aspx?BestType=Bestseller&BranchType=1&CID=1&Year=2013&Month=11&Week=1&partner=openAPI",
"pubDate": "Tue, 05 Nov 2013 07:48:18 GMT",
"totalResults": 200,
"startIndex": 1,
"itemsPerPage": 10,
"query": "QueryType=BESTSELLER;CategoryId=1;Year=2013;Month=11;Week=1",
"searchCategoryId": 1,
"searchCategoryName": "소설/시/희곡",
"item": [
{
"title": "제3인류 1",
"link": "http://www.aladin.co.kr/shop/wproduct.aspx?ISBN=8932916373&partner=openAPI",
"author": "베르나르 베르베르 지음, 이세욱 옮김",
"pubDate": "2013-10-21",
"description": "베르나르 베르베르 특유의 상상력으로 축조한 장대한 스케일의 과학 소설. 남극. 저명한 고생물학자 샤를 웰즈의 탐사대가 17미터에 달하는 거인의 유골들을 발굴한다. 그러나 인류사를 다시 쓰게 만들 이 중대한 발견은 발굴 현장의 사고와 함께 곧바로 파묻히고 마는데…",
"isbn": "8932916373",
"isbn13": "9788932916378",
"itemId": 32136853,
"priceSales": 12420,
"priceStandard": 13800,
"mallType": "BOOK",
"stockStatus": "",
"mileage": 1250,
"cover": "http://image.aladin.co.kr/product/3213/68/coversum/8932916373_2.jpg",
"publisher": "열린책들",
"salesPoint": 72420,
"fixedPrice": true,
"customerReviewRank": 9,
"bestRank": 1,
"subInfo": {
"ebookList": [
{
"itemId": 32241318,
"isbn": "E893291637",
"priceSales": 8100,
"link": "http://www.aladin.co.kr/shop/wproduct.aspx?ISBN=E893291637&partner=openAPI"
}
],
"usedList": {
"aladinUsed": {
"itemCount": 0,
"minPrice": 0,
"link": "http://www.aladin.co.kr/shop/UsedShop/wuseditemall.aspx?ISBN=8932916373&TabType=2&partner=openAPI"
},
"userUsed": {
"itemCount": 9,
"minPrice": 8900,
"link": "http://www.aladin.co.kr/shop/UsedShop/wuseditemall.aspx?ISBN=8932916373&TabType=1&partner=openAPI"
}
}
}
},
{
"title": "제3인류 2",
"link": "http://www.aladin.co.kr/shop/wproduct.aspx?ISBN=8932916381&partner=openAPI",
"author": "베르나르 베르베르 지음, 이세욱 옮김",
"pubDate": "2013-10-21",
"description": "베르나르 베르베르 특유의 상상력으로 축조한 장대한 스케일의 과학 소설. 남극. 저명한 고생물학자 샤를 웰즈의 탐사대가 17미터에 달하는 거인의 유골들을 발굴한다. 그러나 인류사를 다시 쓰게 만들 이 중대한 발견은 발굴 현장의 사고와 함께 곧바로 파묻히고 마는데…",
"isbn": "8932916381",
"isbn13": "9788932916385",
"itemId": 32136901,
"priceSales": 12420,
"priceStandard": 13800,
"mallType": "BOOK",
"stockStatus": "",
"mileage": 1250,
"cover": "http://image.aladin.co.kr/product/3213/69/coversum/8932916381_2.jpg",
"publisher": "열린책들",
"salesPoint": 50880,
"fixedPrice": true,
"customerReviewRank": 10,
"bestRank": 2,
"subInfo": {
"ebookList": [
{
"itemId": 32241317,
"isbn": "E893291638",
"priceSales": 8100,
"link": "http://www.aladin.co.kr/shop/wproduct.aspx?ISBN=E893291638&partner=openAPI"
}
],
"usedList": {
"aladinUsed": {
"itemCount": 0,
"minPrice": 0,
"link": "http://www.aladin.co.kr/shop/UsedShop/wuseditemall.aspx?ISBN=8932916381&TabType=2&partner=openAPI"
},
"userUsed": {
"itemCount": 3,
"minPrice": 10500,
"link": "http://www.aladin.co.kr/shop/UsedShop/wuseditemall.aspx?ISBN=8932916381&TabType=1&partner=openAPI"
}
}
}
}
]
}

NodeJS / Process management

nodejs app을 단일 node 명령으로 실행후 백그라운드 혹은 시스템 데몬으로 다룰 수 있도록 해주는 프로세스 관리 유틸리티를 알아보자:

  1. nodemon
  2. pm2
  3. forever

1. nodemon

1
nodemon ./server.js localhost 8080

express app

nodemon으로 express 의 기본 템플릿을 시작시 bin/www 를 실행애 주어야 한다. app.js 만 실행시 www 에 명시한 포트가 인식 안된다.

1
$ nodemon bin/www

혹은 PORT 변수를 입력하고 실행한다.

1
$ PORT=3000 DB_USERNAME='mongo' DB_PASSWORD='' DB_SERVER='localhost' DATABASE='student' nodemon server.js

2. pm2 설치

pm2는 nodejs app을 실행하고 관리할 수 있는 전문적인 도구이다.
node.js 앱을 시스템 서비스로 등록하기 위해서 pm2 를 설치한다.

1
npm i -g pm2

예를 들어 express 앱이 있으면 다음 같이 pm2로 시작한다.

1
2
cd www-app
pm2 start -n "www-app" bin/www

pm2 log format

pm2 이전 버전은 시작시 timestamp를 로그에 저장하고 싶으면 시작시 --log-date-format 옵션을 이용

1
pm2 start app.js --log-date-format 'DD-MM HH:mm:ss.SSS'

시작 설정 파일에 log_date_format 옵션을 줄 수 있다.

1
"log_date_format"   : "DD-MM HH:mm:ss.SSS",

pm2 2.x 이후 부터는 log 의 형식을 --format 옵션을 지정할 수 있다.

1
pm2 logs --format

pm2 startup

startup 시 pm2 start 로 생성되는 .pm2 디렉토리의 pid 와 app.js 파일을 실행해 준다.

pm2 startup systemd 로 스타트를 하면 2개의 프로세스가 만들어 진다.

방법은,,,

  1. 먼저 앱을 시작해 둔다.
1
pm2 start -n "www-app" bin/www
  1. dump를 생성한다.

pm2로 현재 실행중인 프로세스 정보를 save로 덤프하게 저장한다. systemd 서비스 스크립을 작성하는데 유용하다.

1
pm2 save
  1. pm2 startup 명령

pm2 startup 명령은 pm2로 실행중인 프로세스를 systemd 서비스 유니트 파일로 제어 할 수 있다. 명령을 실행하면 sudo 명령으로 실행할 수 있는 스크립을 출력해 준다.

1
2
3
$ pm2 startup systemd
...
sudo env PATH=$PATH:/home/foo/.nvm/versions/node/v8.8.1/bin /home/foo/.nvm/versions/node/v8.8.1/lib/node_modules/pm2/bin/pm2 startup systemd -u foo --hp /home/foo

이 스크립을 실행해 주면 pm2-foo.service 서비스 유니 파일이 생성된다.

1
2
Target path
/etc/systemd/system/pm2-foo.service

이 서비스 파일을 활성화하고 시작해준다.

1
systemctl enable pm2-foo

이제 시스템을 재시작해도 pm2 로 실행중인 프로세스는 자동으로 시작된다.

3. forever

https://github.com/foreverjs/forever

백그라운드 로그 출력

nodejs app을 백그라운드로 실행하기 위해서 로그 정보를 생성할 수 있다.

The forever process will continue to run outputting log messages to the console.

1
forever -o out.log -e err.log my-script.js

Daemon으로 실행하기

forever 프로세스는 대상 프로세스를 백그라운드로 실행할 수 있는 데몬으로 동작이 가능하다. 이것은 nohup 같은 시스템 도구 없이도 가능다. 데몬 실행을 위해 -o -l, & -e 를 사용하도록 권장한다.

1
2
$ forever start -l forever.log -o out.log -e err.log my-daemon.js
forever stop my-daemon.js

그리고 -m 옵션으로 재시작 횟수를 지정할 수 있다.

here are several examples designed to test the fault tolerance of forever. Here’s a simple usage example:

1
$ forever -m 5 examples/error-on-timer.js

설정파일 지원

forever에 스크립트 경로와 함께 JSON 설정 파일을 전달해 스크립트의 구성요소를 제공할 수 있다. 예를 들어 아래 같은 앱 디렉토리에 developement.json 설정 파일이 있다고 하자,

1
2
3
4
.
├── forever
│ └── development.json
└── index.js

developement.json 설정 파일은 아래 같은 내용으로 구성할 수 있다:

1
2
3
4
5
6
7
8
9
// forever/development.json
{
// Comments are supported
"uid": "app",
"append": true,
"watch": true,
"script": "index.js",
"sourceDir": "/home/myuser/app"
}

Yarn

Yarn

Yarn은 Facebook, Google, Exponent, Tilde가 만든 npm을 대체 할 수 있는 새로운 패키지 관리자 이다. npm의 두 가지 큰 문제를 해결하고자 한다,^Yarn vs npm: Everything You Need to Know

  • npm 의 패키지 설치가 만족스럽게 빠르지 않다.
  • 보안 문제가 우려되고 있다. 설치시에 코드가 실행되도록 하고 있다.

다른 듯 같은 점

yarn의 버전 표기가 다르기 때문에 같은 패키지를 서로 다른 버전으로 설치하는 잘못이 발생할 수도 있다.

npm 5 이후 많은 개선이 이루어 졌다. ^npm 5 vs yarn

  • npm i 는 자동으로 package.json에 의존성을 저장한다.
  • npm-shrinkwrap 가 사라지고 yarn 같이 package-lock.json 파일이 추가되었다.

package.json

이 파일은 npm과 yarn에서 의존성을 유지하기 위해 사용한다. 그러나 버전 번호가 다를 수 있다. 버전을 major와 minor 로 선택할 수 있고, 표기가 다음 같이 다르다 ^npm-vs-yarn

node version: v8.0.0
npm verison: 5.0.0
yarn verison: 0.24.6

npm, yarn 양쪽 버전이 package.json에 명시되어 설치되는 문제가 생길 수 있다. 이것을 피하기 위해 정확히 yarn으로 설치되는 버전은 yarn.lock 에 관리된다.

npm에서도 npm shrinkwrap 명령이 lock 파일을 생성해서 npm install 이 package.json을 읽기 전에 읽어 설치하는 것은 yarn.lock 을 먼저 읽는 것과 같다. 다만 yarn은 기본적으로 yarn.lock을 생성하고 업데이트 한다는 것이다.

병렬 설치

npm 이 패키지를 설치하는 작업은 각 패키지를 설치하고 순차적으로 진행한다. yarn은 설치 작업을 별령로 진행한다.

express 패키지 42개를 설치할 때

1
2
npm: 9 seconds
Yarn: 1.37 seconds

gulp package 는 의존하는 195개 패키지를 설치한다.

1
2
npm: 11 seconds
Yarn: 7.81 seconds

출력

npm 설치 과정은 장황스럽게 표시된다. yarn은 기본적으로 조금 단순하고 자세한 출력 옵션은 별도로 있다.

CLI 의 다른 점

yarn global

글러벌 설치시 npm은 -g, --global 을 사용하는데, yarn은 global 첨자를 사용한다이다. 그리고 npm과 같이 글로벌 설치시에는 프로젝트 지정 의존성이 글로벌로 설치되지 않는다.

global 앞첨자는 yarn add, yarn bin, yarn ls yarn remove 에서만 동작한다.

yarn install

npm install 은 package.json 에 명시된 패키지들의 의존성을 설치한다. yarn은 순서데로 yarn.locak 혹은 package.json에 명시된 의존성을 설치한다.

yarn add [-dev]

npm은 package.json에 의존성을 추가하려면 npm install --save 별도의 플래그를 사용한다. yarn은 yarn add <package> 는 패키지를 설치하고 package.json에 의존성으로 추가한다. 그리고 --dev 플래그를 주면 developer dependency에 추가해 준다.

yarn licenses [ls|generate-disclaimer]

yarn license ls 는 패키지의 라이센스를 목록을 출력한다. yarn license generate-disclaimer 는 모든 패키지의 라이센스 내역에 대한 면책조항을 생성한다.

yarn why

의존성 그래프와 그림을 출력해 준다.

yarn upgrade

npm update와 비슷하게, yarn upgrade 는 package.json에 명시된 패키지를 업그레이드하고 yarn.lock을 재 생성한다.

주목할 점은 패키지를 명시해서 업그레이드 하면 최신 릴리즈로 갱신하고 package.json에 태그를 선언해 둔다. 메이저 릴리즈로 패키지를 업데이트 해준다는 의미이다.

yarn generate-lock-entry

yarn generate-lock-entry 명령은 package.json을 기초로 yarn.lock 을 생성한다. 이것은 npm shirinkwrap 과 비슷하다. 다만 주의해서 사용해야 하는데 yarn.lock 파일은 yarn add, yarn upgrade 시 생성되거나 업데이트 된다.


### 설치

https://yarnpkg.com/en/docs/install#linux-tab 에 설명되어 있다.

macOS

1
brew install yarn

nvm 같은 가상환경을 사용하면 node.js 설치를 제외한다.

1
brew install yarn --without-node

Ubuntu 16.04이하, 데비안 정식버전 에서

1
2
$ curl -sS https://dl.yarnpkg.com/debian/pubkey.gpg | sudo apt-key add -
$ echo "deb https://dl.yarnpkg.com/debian/ stable main" | sudo tee /etc/apt/sources.list.d/yarn.list
1
2
sudo apt update && sudo apt install yarn
sudo apt-get update && sudo apt-get install yarn

openSUSE

On openSUSE, you can install Yarn via our RPM package repository.

1
2
sudo zypper ar -f https://dl.yarnpkg.com/rpm/ Yarn
sudo zypper in yarn

스크립 혹은 npm

1
curl -o- -L https://yarnpkg.com/install.sh | bash

설치후 경로에 추가한다.
export PATH=”$PATH:/opt/yarn-[version]/bin”

사용

The following command uses Yarn to install the express package:

yarn add express

참조

C/C++ 표준

C/C++ 표준

https://m.blog.naver.com/PostView.nhn?blogId=tipsware&logNo=221032917097&proxyReferer=https%3A%2F%2Fwww.google.com%2F
https://junho85.pe.kr/1026

C11 - 2011

https://en.wikipedia.org/wiki/C11_(C_standard_revision))

C99 - 1999

https://en.wikipedia.org/wiki/C99

1
gcc --std=c99

for loop 에 초기화 변수 선언 가능

1
2
for (int i=0; i<9; i++) {
}

C95 - 1995

  • wide character. wchar.h, wctype.h
  • digraphs
  • and for &&
  • STDC_VERSION

C90 - 1990

ISO 표준. ANSI 에서도 받아들임. C89 와 동일한 언어. 약간의 에러 수정

C89 - 1989

https://en.wikipedia.org/wiki/ANSI_C#C89

1989년 ANSI 에서 발표한 첫번째 공식 C 표준

gcc

6.3.1 ~ 7.3.1 - gnu11, gnu++14
5.4.0 - gnu11, gnu++98
STDC_VERSION

https://sourceforge.net/p/predef/wiki/Standards/

C11 - STDC_VERSION = 201112L

Angularjs - Karma Unit Testing

angularjs 단위 테스트에 대해 정리한다.

  • angularjs 1.6.x 에서 진행했다.
  • macOS, Linux 환경에 적합하다.

node.js 를 nvm 가상환경에서 구축하고 사용하는 방법에 대해서는 Node.js Install with nvm 를 참조하면 된다.

angularjs 단위 테스트에 대해 참고한 문서는 아래 참고 섹션에 제공했다.

자세히 보기